|
HOW
TO SET UP A DEDICATED LISTENING ROOM by Steve Deckert
In this article, I'd like to show anyone who's serious about a listening room how to set one up with little or no room treatment. Obviously with the complexity and variety of room acoustics out there, your results may vary, but odds are you will find it an improvement over doing nothing! If you've spent much time on this web site, and looked into our room treatment sections you may have discovered that room acoustics is a fairly serious science and it's usually not solved by random placement of room treatment products. We feel that your room is usually around 60% of what you hear coming from your stereo. Most people either don't believe this, or just haven't grasped it's reality. It's hard to stomach the fact that so many audiophiles concern themselves with connectors and power cords and all the fancy tweaks when these at best pale in comparison to the effect of room acoustics. The biggest problem is most of us don't have a room we can use for JUST our stereo and since we've never had one, or heard our stereo in one, it's hard to really grasp what the differences would be. For many of us, if we could some how magically hear our stereos in a dedicated properly setup room for just a few seconds, it would be enough to suddenly justify having one. Basement rooms would be built, garages would be converted, maybe even kids kicked out to gain use of a bedroom! All I can say, is that in a decent room where everything is ideally setup, the layers and layers a soundstage take on is so holographic that music takes on a whole different side, one that is highly addictive. So if this is you, or you can find a small dedicated room, or have the luxury of arranging your living spaces around your stereo, read on. This story starts with a dedicated listening room, with thick carpeting, real plaster walls, high ceiling. In our search to treat a conventional listening room to a degree that the changes were easily noticed, we ended up using quadratic theory diffusion carefully balanced with diaphragmatic absorption to deal with the reflection points and room peaks that are responsible for trashing good imaging. This was a little more serious than buying a couple tube traps. The final result of what we did was a project that was shared with everyone in the form of D.I.Y. Blueprints. These are available in our online catalog. To effectively treat our room we had a total of 14 units that added over 2100 pounds of mass to our listening room. And that is actually what it took to effect a noticeable result, and turn a rather small 13 x 15 foot room into a good performer. Last year when we built our new shop for manufacturing our Zen triode amps, I needed a listening room there for testing and evaluation. Here was an opportunity to build a listening room from scratch... you can imagine the things that were going through my mind. After dusting off the Masters Handbook of Acoustics and reading it cover to cover three more times, I had a healthy fantasy of what I could do and it was lush let me tell ya. After all, I would be entreating customers or potential customers there and first impressions are everything. Then the lease was signed and I found myself building the interior of our new place all by my lonesome. Between the stress of moving a business without problems and the reality of not wanting to give up 16 feet of my building for a listening room, I gave up and decided to slap together your typical drywall room at a width of only 12 feet. Between the concrete slab, drop ceiling, and cheezy walls I knew it would be bad. I thought, hey... I'll create a worse case scenario here, and then somehow make it sound good just to encourage the REAL world folks who would likely find themselves in similar situations. So with that, I made the room a depth of 22 feet which if you have the Masters Handbook of Acoustics, you would know is just about the worse ratio you could have for good sound. With rational in place, I built my listening room/office and found myself standing in an empty hard room, concrete floor, measuring the decay time of a hand clap. It was ridiculous, I don't even remember now, but not 50 ms. I would be shooting for. Something like 2.5 seconds was the minimum reverb time. Well, this was certainly going to be challenging I thought as I continued to handicap myself by installing carpet with no padding. Once finished, I grabbed a pair of speakers, a Zen amp, and a CD player and tossed them into the room to get an idea of what was going to have to be done. I hit play and then stop. The second of time that elapsed between the two buttons almost made me sterile. My ears were so offended that I took everything back out instantly and went home. Later that evening the realization of what a challenge it would be to treat this room was starting to set in. But hey, if I can't do it, how could I expect anyone else to conquer their acoustic demons? I decided that I wouldn't have time to build more room treatment, so I was going to have to steal the units from my own personal listening room and take them over to the new place. Saddened at the thought, I told myself that it would be so good over there when I was done that I'd do my listening there anyway. (Yea right..) I dropped all 2150 albs. of diffusers and bass traps into the room and dragged another pair of speakers back in for test number two. This time when I hit play, it took around 5 minutes before I ran out of the room in disgust. It was frankly the worse sounding room I've ever heard in my life! I was paralyzed with Father Murphy-itis. Intensely annoyed for days, I avoided the issue by not entering the room. At the same time I was able to hear my own stereo at home minus the room treatments. That didn't help my spirits any except to say the room treatments really really worked well, and the room over at the shop is just really really really really that bad. In the mood to quit goofing around one weekend, I got serious and measured the room at the new shop. As suspected the difference between a 50 cycle note and a 5000 cycle note was a gain of almost 20 dB! Now that's hot. In calculating the amount of absorption I would need to kill this problem I realized that it was almost exactly the density and area of the carpeted floor had there been good padding under the carpet. Now with over 2000 lbs of stuff in the room, I wasn't going to have padding under the carpet so I started absorbing it in bits and pieces and in a variety of ways. Padding would have been so much easier. Once completed, and after building a permanent bass trap out of an unused closet, I got the room to become fairly flat with decent response at 30 cycles and some sense of order. It was now listenable, and as the weeks went on with continued tweaking and creative room treatments I had a room that was at least 800% better than before I started.
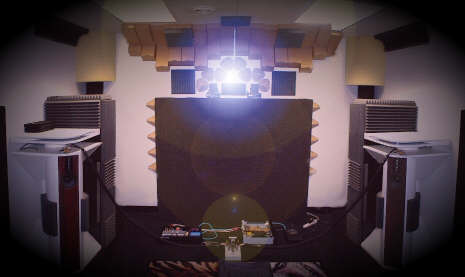
A picture of the end result can be seen above. And it is a listenable room now. However my personal listening room at home has lost it's luster and no longer seduces me into hours of evening listening. In fact, I abandoned it for almost a year. On a whim one evening, I decided to set up some gear in my home listening room again fairly certain I had forgotten how good it used to sound by that time. Only this time I set it up diagonally which is something I had never done at home in any of my listening rooms. But the more I thought about it the better the idea seemed to be. So I went for it and took a pair of speakers (that were exiled from the shop because everyone hated them) home and set my room up. The result really caught me off guard. Before I did it, Still having the tape marks on the carpet from last year, I set the speakers up on the old marks and listened in a conventional way. That's when I learned my own acoustic memory is longer than one year because it really sounded nasty. It sounded nothing like it used to with the room treatment. But the exact same gear set up at a 45 degree axis within the room sounded better in almost every way than the room did the year before when it was set up conventionally and with all the room treatment diffusers and such. Well, what do you do when your sitting in a naked room with two waynky-dink speakers that no one likes and you're getting better sound and imaging than you've ever had before without room treatment? Well first you panic, then you resolve to tell noone and then you desperately try to figure out what happened. Along the way of figuring out what happened I made some revelations about imaging that I think you may find interesting. How many of you have heard your stereo or someone else's with a strong center image that exhibits good depth? Now how many of you have got that center image to shift from one side to the other when you move your head? Ever wonder why that happens? I certainly have. In fact I have an ongoing experiment in progress trying to resolve that very issue. In any case, the bulk of that experiment resulted in my own recording studio so that I could experiment using recordings that I created and mixed down myself. I have found the reason for the shifting effect is two fold, the way it was recorded and an effect from your own room acoustics. I will probably do a paper, or several, on recording techniques so I'll leave that out here and just focus on the room effect that I feel accounts for most of the effect anyway. As it turns out, the reflection points that triangulate around the room are vastly different when set up on a 45 degree axis. In a conventional room, the first 4 to 6 reflection points of a speaker are on the wrong side of the room. In other words the direct energy from say the left speaker will have it's first four or five reflection points on the right side of the room. This often ends up with reflections 8, 9 or 10 on the rear wall behind your speakers staged to pass back by your ears. Since a conventional room is untreated, these reflections don't loose much energy and continue around the room with minimal drop in amplitude. In fact in one second of listening time, the sound from one speaker will reflect around your room over 500 times. It is important for you to get a real understanding of reflected sound vs. direct energy. Direct energy is the sound wave that comes directly from your speaker and passes by your ear. Reflected energy is everything else that you hear. If these reflections are not reduced in amplitude AND in time you brain will have difficulty telling which one is the direct sound and which one is the reflected sound. Localization cues will be destroyed and the result is an out of focus sound image. To get a grasp on this, turn your speakers around 180 degrees so they face directly away from you and spend some time listening. Listen from your chair and from different places in the room. REALIZE that everything you are hearing is reflected sound and nothing your hearing is direct energy. In an ideal setup you would want to hear only the direct energy with none of the reflected energy. Think about that for awhile during your listening experiment. The difference between good sounding stereo and bad sounding stereo is I figure at best 50% the room, or specifically how the reflected sound is handled, and 50% the quality of the gear you have. While I'm thinking about it, and after 20 some years of wondering for sure, I have concluded without doubt that as far as gear is concerned the Source is the most important part followed by everything that follows it and in that order. The only thing more important than the source is the room you play it in. Let's look at a conventional setup, as shown in figure 1.
The room shown in figure one contains a listening chair and the only the left speaker for simplicity. The speaker is shown in the color red. Since most localization cues for the human ear are higher in frequency, this simple diagram can be used to demonstrate the reflection points with the highest energy. You may remember that higher frequencies are more like a narrow beam, the higher the frequency the narrower the beam. Bass by contrast enclosed in a room with 4 walls is omni-directional. For starts, concern yourself with the black lines and the numbered reflection points. The yellow lines will be discussed later. These black lines represent the center of the higher frequency sound beam. Every time sound hits a surface, such as a wall in your room, there is some sympathetic resonance in the wall itself as well as refraction. The black line in figure 1. only shows reflection. This means that even though reflection point #1 is located behind the listener, he or she will still be able to hear the result of that reflection which is resonance and refraction. Refraction would be sound that didn't perfectly follow the angle of the line, and instead randomly refracts back to other places. This effect was first talked about in the 80's when speaker manufactures realized that boxy grills and sharp corners on speakers were responsible for refraction's that distracted from the imaging. Reflection point #1 depending on the wall surface could effectively move midrange and higher frequencies closer to the listener. In other words, it could artificially drag parts of the soundstage forward. Reflection point #2 is located on the rear wall behind the right speaker. It would be desirable to have it behind the left speaker if you had to have it at all. This particular point could have the effect of enlarging the size of images by stretching them horizontally and at the same time defocusing the primary image. Reflection point #3 is also on the wrong side of the room causing further confusion in your perception of the original image. Reflection point #4 is also on the wrong side of the room now behind the listener again, and even though reflections 5 ~7 are in the correct half of the room, they simply set the stage for the next half a dozen reflections to be on the wrong side of the room again. You'll start to realize it's no wonder we've all spent so many maddening hours trying to get stuff to image better isn't it? ALSO in figure #1 are some softer yellow lines that show what happens when you change the toe angle of your speaker by only a few degrees. If you start at the speaker and following the line you will see that point #1 has moved left be a couple feet. This would have the same effect as the original reflection point #1 but with the added illusion of better width, moving your image to the left slightly. The second, third, fourth, fifth, and even the 6th reflections that follow on the yellow line are now on the wrong side of the room. It is easy to see if you study the possibilities for awhile, what is actually happening to your imaging and the shape and size of your soundstage by the major location changes of these reflection points with minor adjustments to your speakers. Also the room in figure one is a 13 x 15 foot room. I choose this shape because it's more likely to occur in your homes than a perfectly square room would be. Naturally, changing the dimensions of the room in Figure one drastically changes the locations of the reflection points, but you will find in most cases those first critical 5 or 6 points end up on the wrong side of the room. Now, if you added the second speaker to Figure one, and mirror imaged the points, you would have left channel information in both ears, as well as right channel information in both ears. Not an ideal situation at all. The result of this room effect is a projected mono image in the center of your speakers that shifts to the right when you move your head to the right and visa versa. This is not real. And if the recording was mixed with the vocalist off center slightly, the effect will defocus the image more than if the recording was panned dead center. In this situation, which is one that 99% of all listeners are in, recording techniques will be colored to a degree that some will seem to image well and some just terrible, all depending on where the pan pots were set in relations to the reflection points in your listening room. Adding absorption and diffusion to the wall surfaces at these critical points can reduce the problem to an acceptable level, but never eliminate it entirely. Nothing is truer than the statement; "You can't make a bad room sound good" and the reason it's so true is that "bad" rooms are locked into a particular performance by their dimensions which can't be changed. All the room treatment in the universe can only reduce the negative effects of the bad dimensions. This really hit home as I went back and forth between the two setups. Let's look at the second setup in the same room. Here's the same 13 x 15 foot room with the diagonal setup in Figure 2.
Notice in this set up even at the somewhat random placement I came up with for this drawing, the only points that are on the wrong side are points 4 and 5. And reflection point 5 considering where it is, isn't too critical. The lighter yellow lines show what happens when the speaker is toed in by a few degrees. Basically nothing really changes much. Dots shift rather than changing walls. In practice I have noticed this arrangement to be far more forgiving as far as speaker toe angle, and much more flexible to actual speaker placement. This arrangement also has a much larger sweet spot. The fascinating thing here is the results. When compared to the conventional setup with all the room treatment diffusers and so on, I find this arrangement in the naked room to be actually better. Before and after this setup, I used a variety of CD and LP recordings including several of my own that I recorded myself in my own studio of various guest musicians and jam sessions. In these recordings care was taken to properly mike the room, and quality gear was used. From these reference recordings I could now make a test of the Shifting effect I spoke of earlier knowing this time exactly how mixdowns contribute to the effect. The result was this: In the conventional set up shown in figure 1., the effect was present even in my own recordings. In the diagonal setup shown in figure 2,. the effect was gone. I could move my head as much as 2 feet in either direction and have no shifting of the center image. Profound. So, in short, I now have my listening room back. Before I had a width of 13 feet and a depth of 15 feet. Now in the same room I have a width of over 19 feet and a depth of over 19 feet, and it sounds like it too. Taking it to a finer level would be fairly easy by purchasing a laser pen and fastening it to the top of your speaker and then taping mirrors to your walls to find your exact reflection point centers. This is where the most energy of each reflection is located. Once you have found a way to get as many points on the correct sides of the room respectively, then you can take action to treat the offending points. For example in Figure 2., the reflections points 4 and 5 are on the wrong side of the room. They could be treated. Keep in mind that eliminating those points would eliminate all the successive points and reduce ambiance. This could be a good or bad tradeoff depending on the actual locations of the points. But nonetheless it is the approach one would take. Its also interesting to notice in this model how the corners become your friend in the way they triangulate the points. Not unlike a pool ball. In a conventional setup such as shown in figure 1., the corners are NOT your friends and ironically for the very same reason. Bass issues will also be a little different in this scenario when compared to a conventional speaker and listener placement, but all in all you should still trap the bass. Since bass does not triangulate around the room in tight enough patterns to create reflection points this angled setup will not do much to correct room boom issues. So in conclusion, the results of the diagonal setup were superior to the conventional setup, the irony is that this was with no room treatment in the diagonal setup and both with and without over 2100 lbs. of diffusion in the conventional setup. I would say that if you're serious enough to have a dedicated room for JUST your stereo, you can have a better room than our reference room was at one time with all the treatment., and do it for nothing. If you HAVE to have a home theater using a big screen TV and stereo together in the same room, then this diagonal setup will largely reduce some of the imaging problems provided you locate the TV as far back in the corner as possible.
Decware is a trademark of High Fidelity Engineering
Co. |