|
Zen Triode Preamp model CSP2 designer's notes
I know why there are not more audiophiles into headphones. I was one of them - and being the type who is really taken by good sound stage depth I never particularly cared for that in your head imaging of headphones. Headphone enthusiasts will often remind you that ďgoodĒ headphones are typically not like that and while partially correct, most fail to realize that it is in fact the headphone amplifier that makes the most difference.
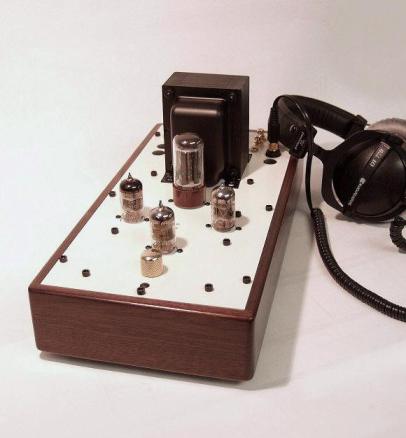
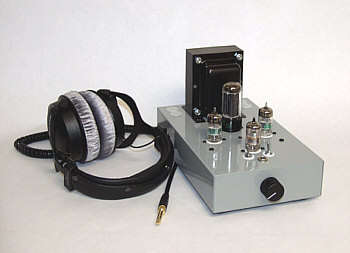
So back to the benchÖ Iím basically thinking that by eliminating the expensive Sowter transformers we could get the price way down, and that basically leaves OTL. I choose not to go with OTL designs when I did the MLB simply because I only knew of two ways to accomplish it, and both had little appeal to me. The first way is to run several tubes in parallel to get the output impedance down low enough to drive headphones. With every tube you parallel, you loose transparency. I just canít get into the sound, too spoiled. The second way is to use a super large value capacitor in place of the output transformer. This second method would ideally hit the goal of reducing cost, but I have never considered it seriously. This is one of those defects of too much thinking. I can say that now because I built one thinking it was going to be inferior in almost every way. For years I would never waste my time trying it. I listened to a couple OTL headphone amps and concluded that the extra large cap just couldnít compete. I was wrong. In the one I built, I was completely shocked at first listen. Even fresh of the bench it was so pleasing to listen to that it made the MLB sound almost hard. The ambiance was so prominent that it sounded as if I were at the venue, not wearing headphones. The bass was unbelievably low and organic. Music that draws your ears to it rather than music that penetrates or sometimes violates. I was amazed that it sounded so much better. Had I tried this from day one, things would have been different. Still fascinated that this sounds good, I wanted to hear it in the context of a preamp driving our amplifiers in my reference room so I added some line level outputs to the circuit and gave it a listen. After about 20 minutes I realized this may be as good as the CSP preamp so I warmed it up and A/Bíd the two. It was better than the CSP. Slightly more defined and focused / a bit more powerful sounding but otherwise almost identical. This was another surprise. And thatís how it happens. Serious now, it changes from a project to consuming all of the R&D time and my full attention for awhile. This comes at the same time as our new Anniversary platform which trades the black 10 x 6 x 2 inch steel chassis for a 2mm thick T6 Aluminum plate that has been stretched to 14 x 6.5 and mounted into a solid walnut base. The higher mass chassis are less effected by resonances and offer an extreme high quality appearance and other advantages. The final prototype when viewed as a replacement for the CSP has several advantages over it besides sounding slightly better. The CSP circuit consisted of a gain stage with low plate voltages driving a single cathode follower with a trim pot between the two stages for calibration. Due to the lower than normal voltages that in part made it sound so good, the input stage had to be adjusted to match different input voltages. It was well adept at offering lots of gain to lower input signals of 2 volts or less, but had to be adjusted internally with the trim pots for voltages higher than 2 volts. The CSP2 circuit consists of a gain stage with higher plate voltages driving a SRPP stage similar to the original MLB design. The stages are direct coupled. The SRPP stage drives the output capacitors. The line level is taken directly off the outputs via a 100K precision trim pot. The output impedance is about 10 times lower than the CSP so using line level outputs has no audible effect on the sound of the headphones. The output level is adjustable and the trim pots are accessible from the outside, one per channel. With a 2 volt input, the line level output can be adjusted smoothly between 0 and 36 volts with virtually no distortion on the scope. Factory setting will be a 4 volt output giving it plenty of authority with our amps. High power amplifiers and or amplifiers with input sensitivities of 1 volt or less will benefit from adjusting the voltage to around 1 volt. Lower power tube gear that sometimes requires 5 volts or more to drive it because it lacks enough gain stages, will be best served by settings between 5 and 8 volts. This insures complete synergy and compatibility with virtually all amplifiers. Having adjustable gain allows the serious audiophiles to run the volume control wherever they feel it sounds best while maintaining the desired level of output at all times. Independent adjustment on each channel also allows for channel balancing. NOISE Having the line level output variable means that any noise in the system will be reduced rather than amplified. For example, the CSP2 has a noise and hum level of 0.4 mv with the volume turned all the way up, and the trim pots all the way up at the full 36 volts of output. That alone is by far the cleanest thing Iíve ever built, but since the average user will have the output level adjusted to around 4 volts. That means whatever residual noise floor there is will be dropped by around 8 times. When I set the units up for a 4 volt output the level drops to the limit of my meters at 0.1 mv Part of this comes from the decision to implement a DC power supply for the tube heaters. These improvements will make the preamp far more forgiving when it comes to tube quality and should invite more NOS tube rolling with better results. The general layout and configuration has a few improvements also. There are still two inputs and a selector switch, but the locations have been changed resulting in half the wire being needed to interconnect the input jacks to the first gain stage. Now a simple non-shielded run of silver/ Teflon wire can interconnect the two. The output besides having the obvious headphone jack, also has a 3rd mono jack that can be used to drive a subwoofer or mono center channel etc. As with all the products built on this platform, we are using our more expensive world voltage compatible transformers. These are significantly larger in physical size to accommodate the extra voltage windings and meat CE ratings. These can be wired to any voltage requirement. One of the biggest secrets behind the original CSP was the fact that the power supply is so large that it has no variance in output just like a regulated supply, but does it naturally and without a lot of heat. The CSP circuit draws around 30 ma and the power supply can deliver 150 ma. Power supply size and quality are always the first place corners are cut in the world of mass produced hi-fi gear. This is why we do the exact opposite. A lifetime warranty is just a pleasant bonus made possible by this type of thinking. In the end we have a product that looks 10 times better than both the MLB and CSP that it replaces and sounds better than both for less than the price of the original MLB. Occasional production glitches from delayed English transformers are also eliminated. If someone who was new to the whole tube world wanted to hear it at itís absolute best, they could get the CSP2 and a decent pair of headphones without breaking the bank. They could then experiment with one or two CD players to get a feel for how much improvement in sources is possible and in the process would indeed be able to hear the magic I so often go on about. Unlike if someone buys just a preamp or amplifier and introduces it into their system, this way is a sure shot. And as I mentioned, it can be the worlds best tool for evaluating cables,
sources and becoming familiar with how recordings actually sound. Armed with
this as a reference you can EASILY hear huge differences between sources and
cables whereas in your listening room those same differences are often unheard
due to other things handicapping the system including and especially the room
and speaker locations. It allows you to hear frequency response that is actually
flat without the peaks and holes. You never hear the music get sharp, dry or
offensive. The bass is completely flat all the way down to around 5 Hz. Bass
with no holes or peaks down to any frequency is impossible in any room and in
even the best rooms true 20 cycle notes are mostly fantasy. Like I said, it will
let you hear what it was intended to sound like - and that reference alone will
cause you to improve your system by your knowing exactly what you want it to
sound like. This is so much easier than being blind with no true reference and
just trying to make something sound good. It ultimately means you make far fewer
mistakes when purchasing gear and spend far less money as a result.
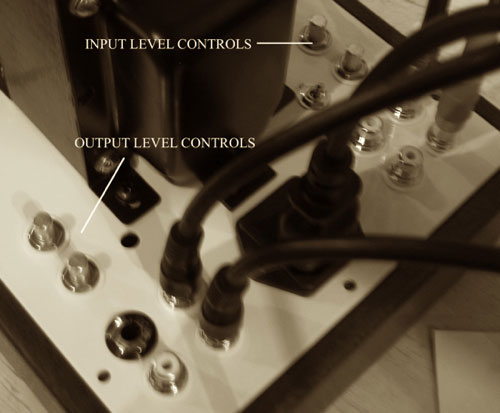
Input level Controls added in the final 2010 revision Sometime
in 2010 the final revision for this amp came with the model number
CSP2+. This somewhat minor revision did two things: Improved
the internal layout, reducing the amount of wire used and added a pair
of input level controls to
compliment the existing output level controls. While completely
unnecessary for line level use, there is an improvement for headphone
use. Some high impedance, high efficiency headphones simply get
too loud, too fast. This makes it harder to adjust the volume
control in fine increments. It also puts the master volume control
at the very beginning of its range before it gets too loud, again a
less than ideal result. By adding input level controls, it is now
possible to drop the gain for the headphones in the same way the output
level controls can drop the gain on the line level outputs. So, if
you were getting loud at one or two clicks of the master volume with
your headphones on, you can now use the input level controls (one per
channel) to drop the source level - effectively multiplying your master
volume control's range by up to ten times. Instead of two clicks
to get loud, you can adjust it to take 20 clicks to get loud - giving
you 18 clicks of adjustment into lower volumes that you didn't have
before. It was the perfect upgrade to this well loved
preamp/headphone amp.
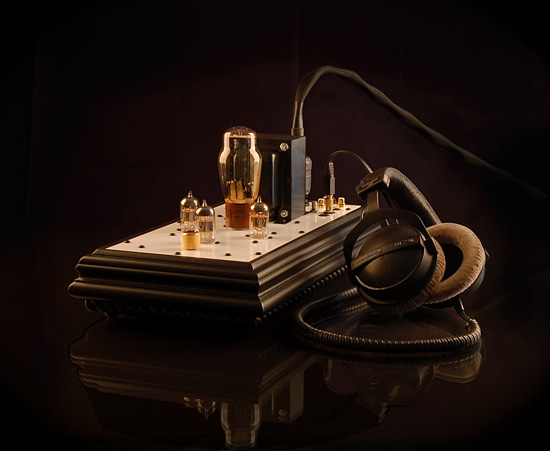 CSP2+ OTL Headphone amplifier/preamplifier
In 2013 we wanted to make the cryo treated beeswax signal caps an option but they would not fit in the present layout so while we were at it several changes were made. First we changed the chassis from white to black to match the rest of our line and we changed from T6 aluminum to steel to increase the mass. Then we changed the layout to accommodate the larger caps as well as make several other internal improvements all designed to improve transparency. All of the input and output level controls were moved from the rear of the unit to the actual location in the circuit where it could be utilized without additional wire. This is why you see them so close to the tubes. The input level adjust is directly next to the input tube, and the output level adjusts are directly next to the output tubes. We also set the unit up for XLR and or 1/4 headphone jacks and placed them in the front on either side of the volume control. 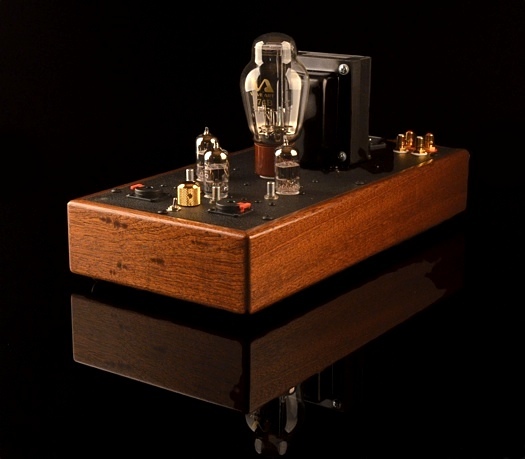
|
|
Decware is a trademark of High Fidelity Engineering
Co.
|
